Table of Contents
TAPAS Tutorial Input/Output I
In this tutorial we will learn some basic functions of TAPAS. We will learn how to download images from an OMERO database. TAPAS is a tool for automated processing and analysis, designed to work with an OMERO database, but it can also work if files are stored locally.
If you do not have OMERO, read the tutorial until the end, since similar concepts are adopted for files.
Connection
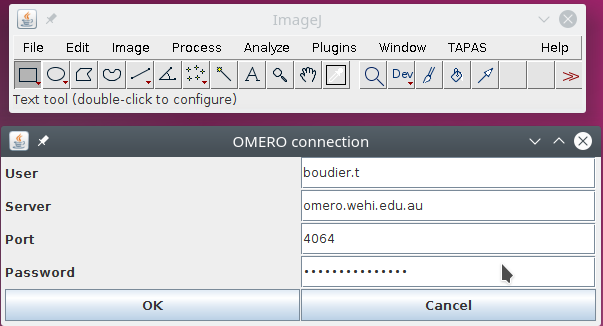
We need first to connect to the OMERO server, this is done by using the plugin TAPAS CONNECT.
When you run this plugin, you will get a window asking you the information about the OMERO server :
- your user name used in OMERO
- the server address
- the port to communicate with the server, usually it is port 4064
- and your password
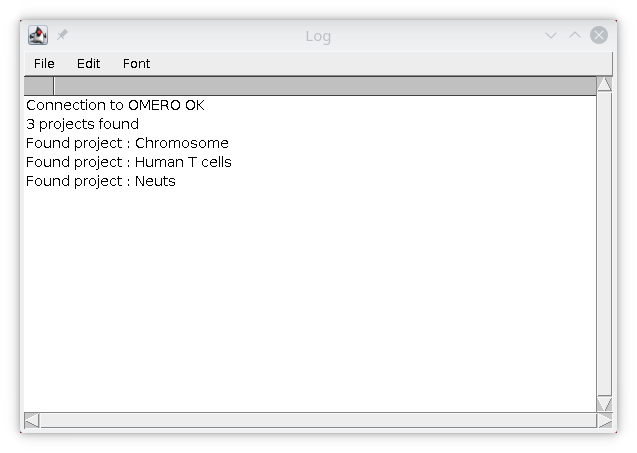
When you press OK, the information is encrypted and saved on your computer. The log window will display the list of projects stored on OMERO that you can access. If you belong to multiple groups on OMERO, this will display the list of projects only for the current group, if you want to work with projects for other groups, please change your default group in OMERO.
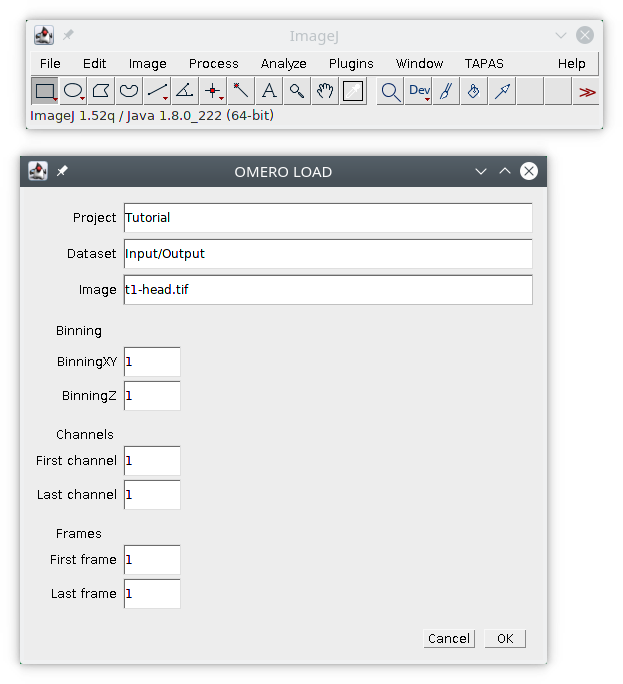
Two plugins are available to dowload/upload data from and to OMERO. The first plugin is OMERO Load, simply enter the information about the image you want to download from OMERO : project, dataset, image name. You can also specify if you want to laod a binned version of the image using the binning parameters in XY and Z. If you have an hyperstack (3D+time+channel) you can specify which frames and channels to load by specifying the first and last channel, and the first and last frame. Note this plugin can be macro recorded.
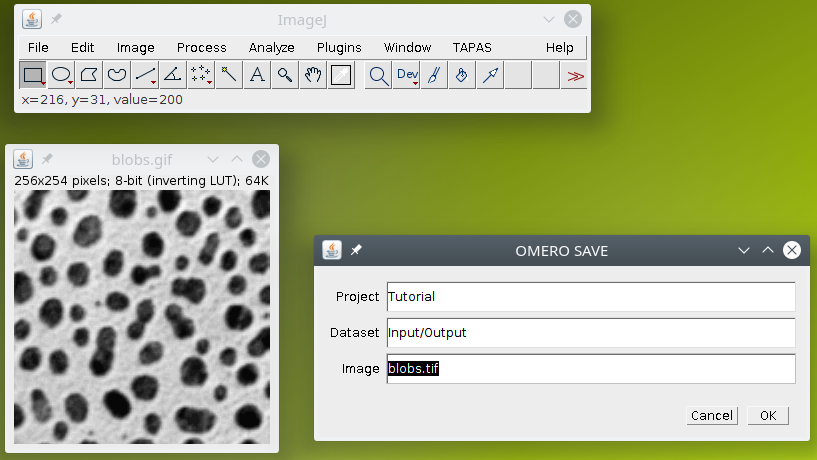
The second plugin is OMERO Save, it will upload the current image to OMERO into the specified project/dataset with the specified name.
Install tutorial data in OMERO
We will use sample images from ImageJ, you can download them from Open Samples directly in ImageJ or here. In this tutorial we will use :
- confocal series
- hela-cells
- leaf
- mitosis
- t1-head
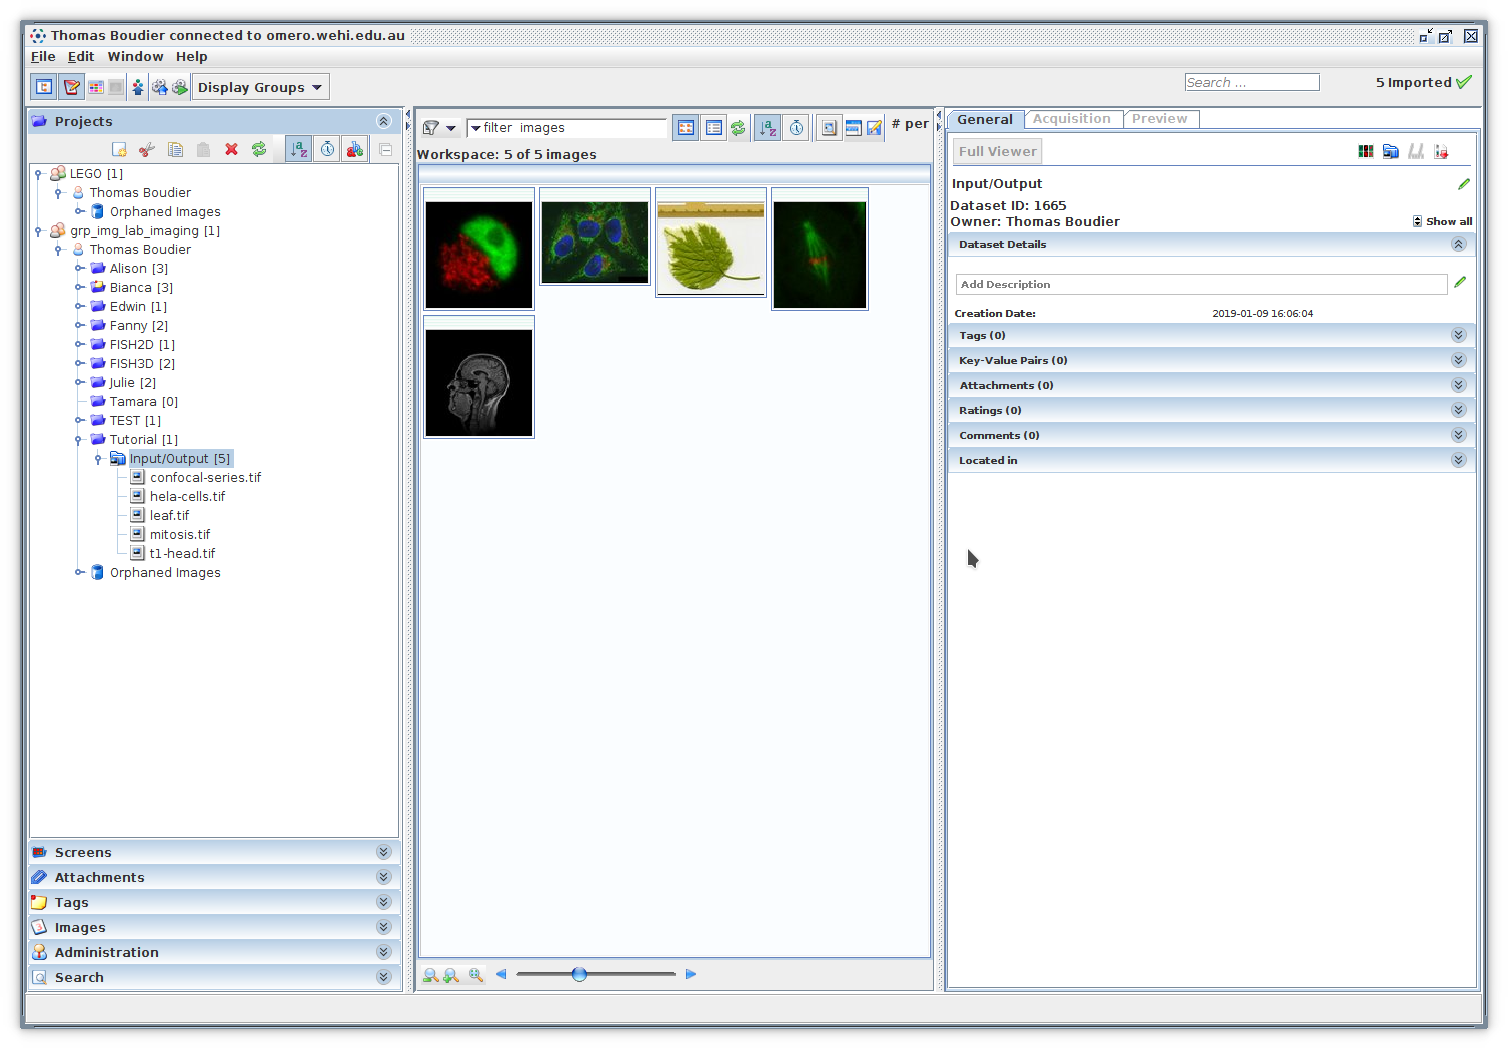
Download the images in a temporary directory. In OMERO create a Project Tutorial and a Dataset Input/Output, then import the images into this dataset.
Select data to process
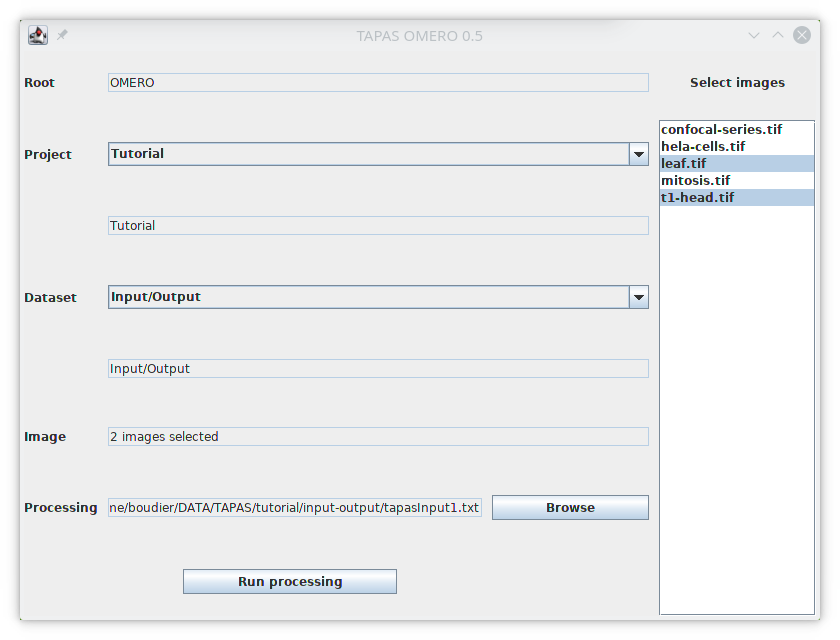
The plugin TAPAS OMERO allows you to select images stored on OMERO and process them. First we will earn how to select images. The plugin will open a window that will allow you to select the project, dataset and images you want to process. First the list of available projects should be available next to Project. Select the project Tutorial, the list of available datasets inside this project will be listed next to Dataset. Select the dataset Input/Output, the list on available iamges in this dataset will be listed below Select images.
Then we need to select the images inside the list, you can select one image, its name will be displayed next to Images, you can select multiple images with Ctrl and Shift, if more than one image is selected, the number of selected images will be displayed instead.
Your first processing
We will learn how to create more complex processing pipeline in another tutorial, here we just use a basic pipeline that will read some images from OMERO and display them. A processing pipeline is a simple text, our first pipeline is then :
// input data from omero
// the name of the process is input
// it is defined in the file tapas.txt in the ImageJ folder
// by default it will open the first frame and first channel of the selected data
process:input
// we show the data with the process show
process:show
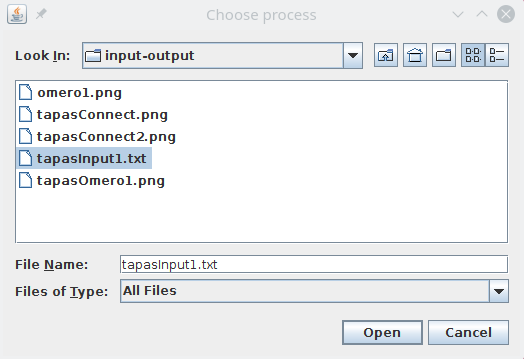
Create a text file name tapasInput1.txt,copy the above text and save it on your computer, then next to Process use the Browse button to select your text file.
The path to the processing pipeline will be displayed next to Process.
Running the processing pipeline
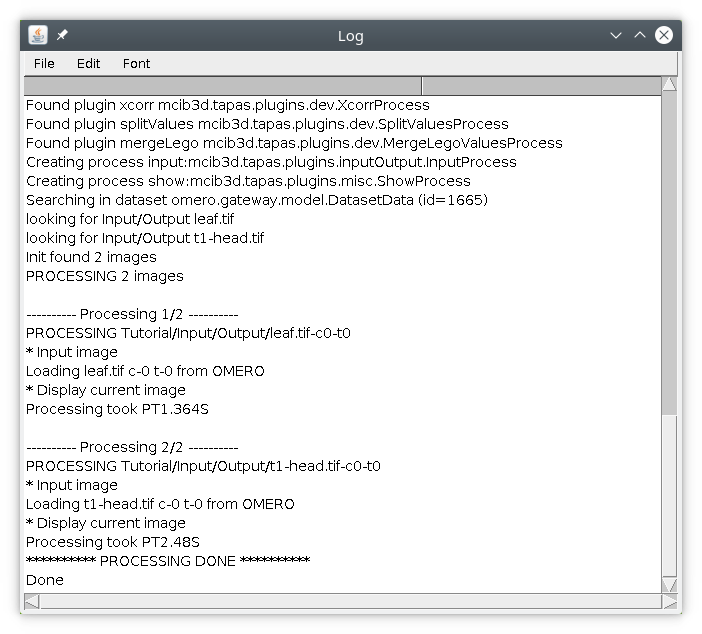
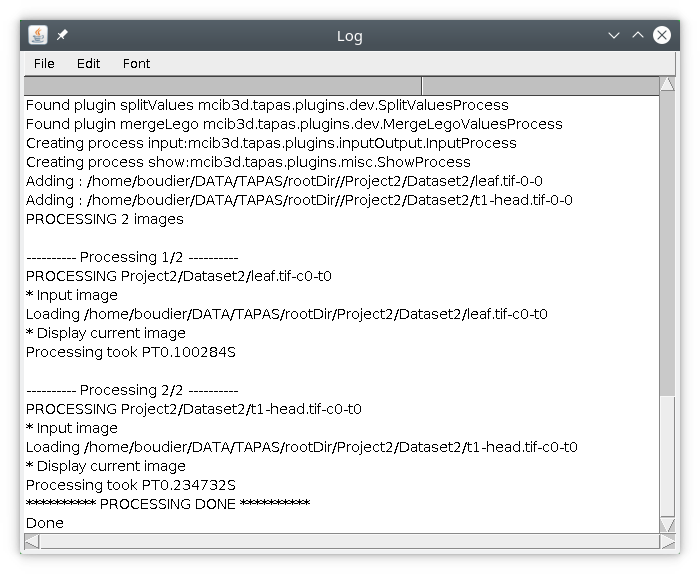
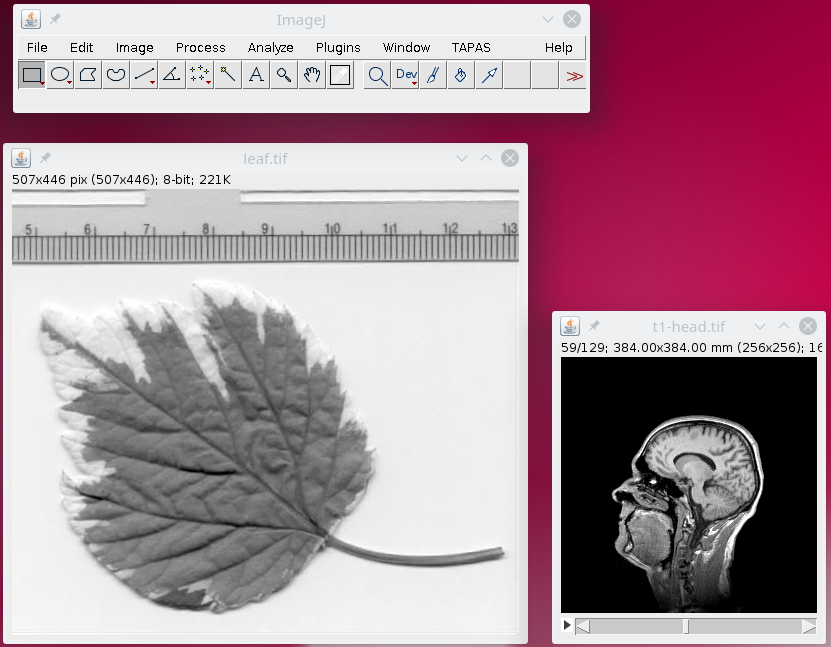
In this tutorial we will start by selecting the two images t1-head and leaf. Once the text file containing the processing pipeline (here tapasInput1.txt) and the images to process are selected, you can run the process by pressing Run processing. Information about the processing will be displayed in the log file.
First the list of available tapas modules will be listed, then information to create your pipeline will be displayed, along with information about the images to be processed. Then the processing will display information of the processing for each image, such as the details about the processing and the time to process the image.
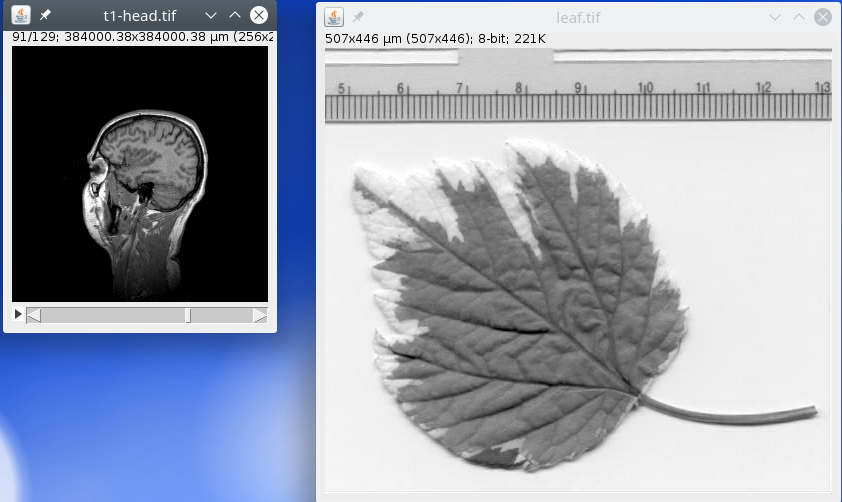
After the processing is finished, the two images t1-head and leaf should be displayed.
Note that by default TAPAS will read only one 3D image from your data, by default it will be the first channel, channel 1. Similarly, by default, it will load read the first frame,frame1.
TAPAS without OMERO
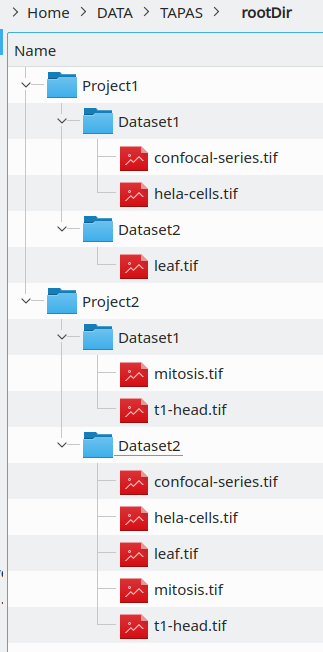
If you do not have OMERO, your data should however be structured in a similar way :
- a main root directory
- some projects directories within the main root directory
- some datasets directories within the projects directories
- some images within the datasets directories
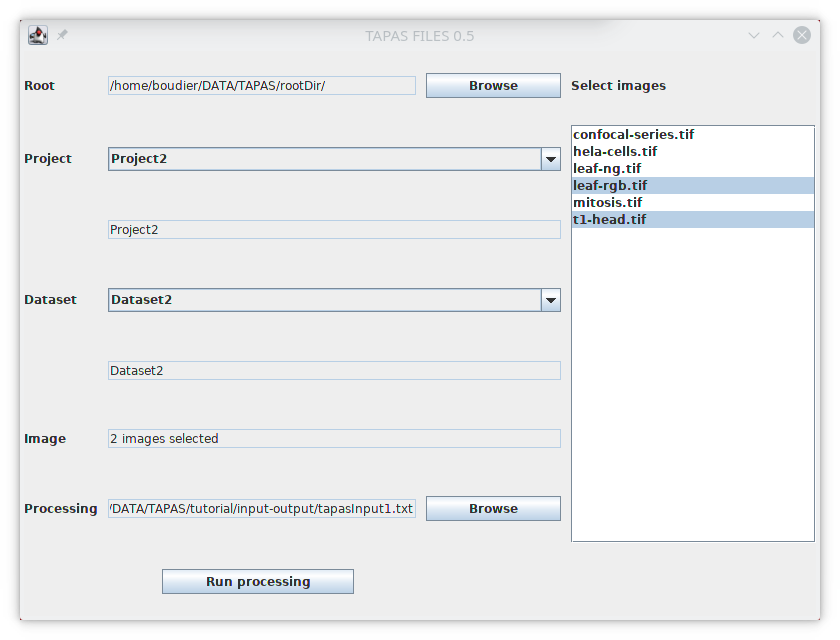
You can then run the plugin TAPAS FILES that is not unlike TAPAS OMERO except that you will need to specify the root directory by pressing the Browse button next to Root. Then you will be able to select the Project directory, the Dataset directory and the set of images to be processed.
Note that the input process will only load one channel at a time, like with OMERO. TAPAS will work with composite multi-channel images, but not with RGB images. You need in this tutorial to convert leaf.tif from RGB to Composite in ImageJ using the command Make Composite.
Similarly, the images will be processed, by default the bioformats plugin will be used to read the files, and only the first frame and channel will be read.
Dealing with hyperstacks
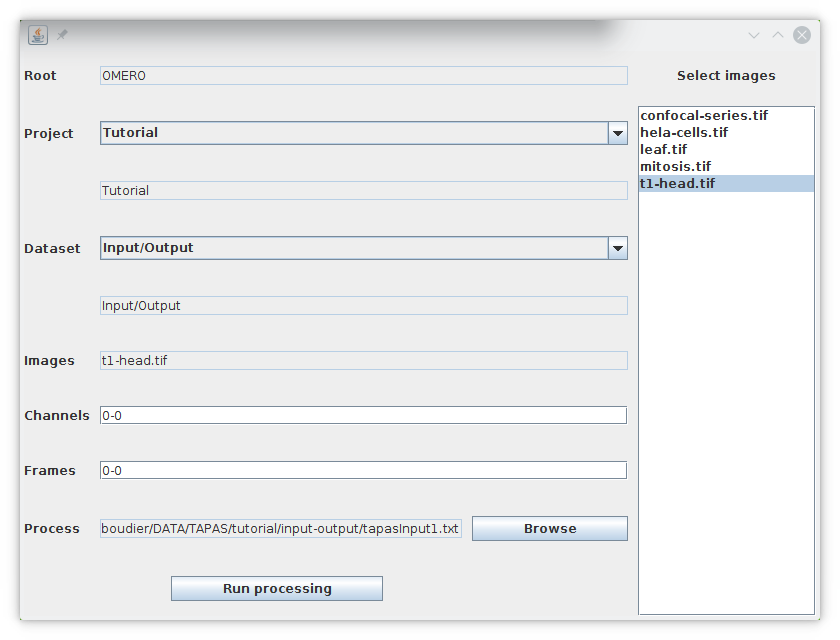
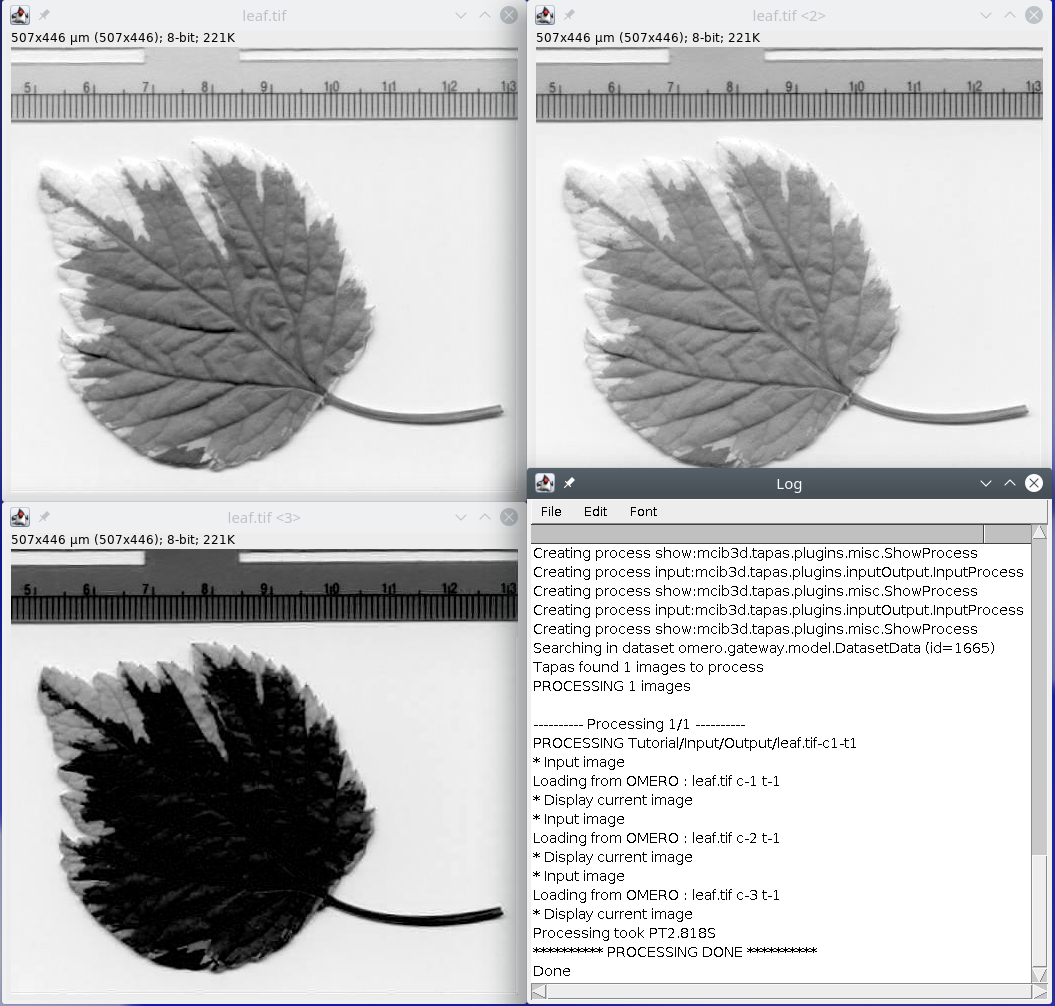
We learned the first processing module input to read images either from OMERO or files, if you are using TAPAS OMERO or TAPAS FILES. BU default TAPAS will work with 2D or 3D (XYZ) images. If you have images with more than one channel or frame, you may need to read and process the channels and frames separately. To read a specific channel with the process input, you just need to specify the parameter channel (channel number starts at 1).
// input data from omero
// by default it will open the first frame and first channel of the data
// the channel to open is specified with parameter channel
process:input
channel:1
// we show the data with the process show
process:show

// now we input channel2
process:input
channel:2
// we show the data with the process show
process:show


// and channel 3
process:input
channel:3
// we show the data with the process show
process:show
If you apply this script to the leaf image, which is composed of three channels, it will read the three channels and display them.
Pushing back images to OMERO or files
Now that you understand the concept of the process input, we can now go to the module output, that will save images back to OMERO or files. Bu default it will save the data into the same dataset (or folder) as the input image, you just need to specify a new name.
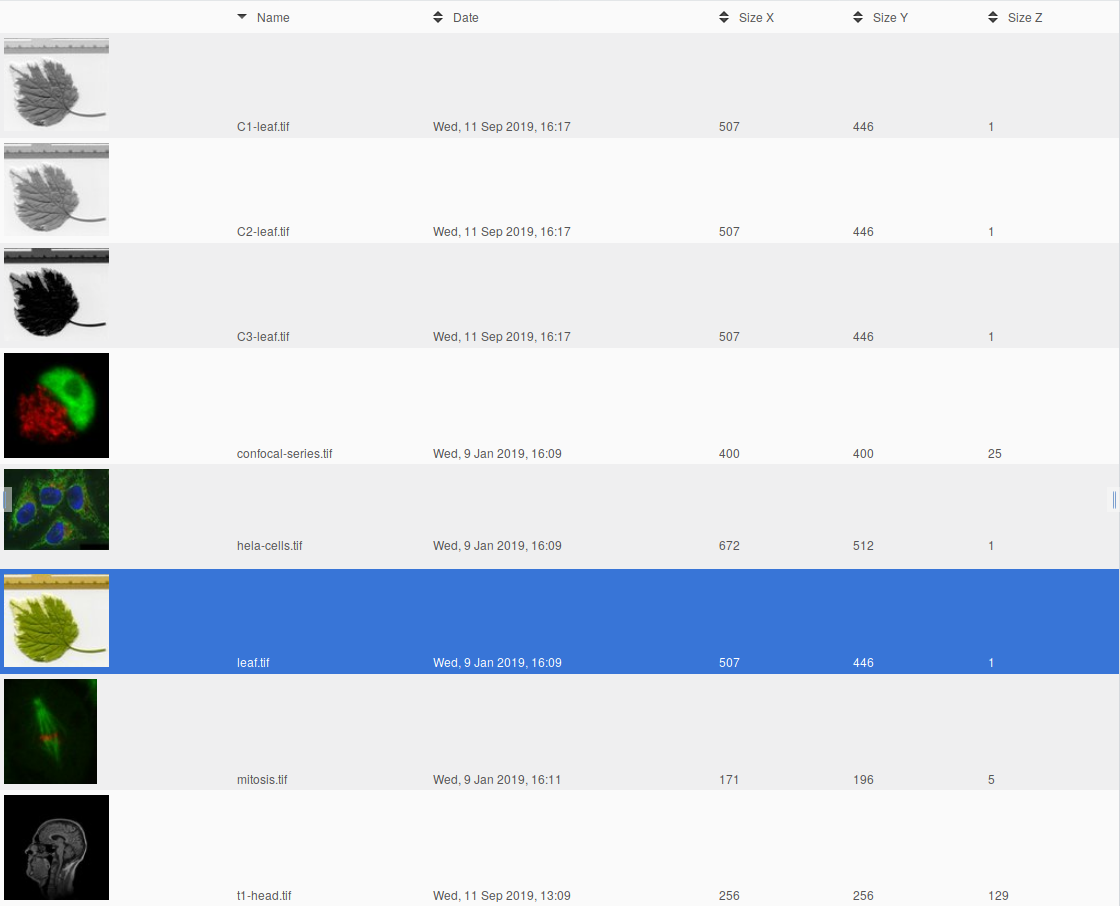
You can specify an absolute name like newImage or channel2, but if you are processing many images the same name will be used for all images. You need to specify a name based on the name of the current image. For instance if you want to process image leaf.tif and extract all channels and save them as C1-leaf.tif, C2-leaf.tif and C3-leaf.tif, you can use the keyword ?name? that will refer to the name of the image that is being processed.
// input data from omero
// by default it will open the first frame and first channel of the data
// the channel to open is specified with parameter channel
process:input
channel:1
// we now output the channel 1 image to Omero or files
// with C1- as prefix, and then we sue the name of the image being processes
process:output
name:C1-?name?

// now we input channel2
process:input
channel:2
// we now output the channel 1 image to Omero or files
// with C2- as prefix, and then we sue the name of the image being processes
process:output
name:C2-?name?

// and channel 3
process:input
channel:3
// we now output the channel 1 image to Omero or files
// with C3- as prefix, and then we sue the name of the image being processes
process:output
name:C3-?name?
If we apply this script to leaf.tif it will load the 3 channels independently ans save the corresponding channel image to Omero or files.

